
Pages

10 Things to Consider Before Buying a Fixer Upper

Monday, August 15, 2016


1.       Something will go wrong.


It might be while you’re moving in, painting your new house, or just at the worst possible moment. Our dryer broke while we were washing our bath towels, which meant we had no towels to take a shower... gross.

2.       You will become an expert at everything.
 
Do you know what a gopher hole looks like? Neither did I. You will study and learn about the most random of things. You will feel like you are equipped to fix anything with your newfound knowledge and at the same time feel like you have so much left to learn.

3.       Small jobs will take hours or days.


This wallpaper was taken down in June and will probably be cleaned and painted by September. My advice: do not start another project until you have finished the one you started.
 

4.       You will take multiple trips to your local home improvement store.


There is always one more thing you need that you forgot about. Late night trips, early morning trips, and multiple trips in one day.

5.       You will get frustrated and want to give up.

 
These two spots are on the same wall. The one on the top didn't adhere because we didn't wait long enough for the plaster to dry.

Don’t rush, do it right the first time and you will not be disappointed.
 
6.       Things will constantly be dusty.
 
Did I just wash these floors yesterday? Yep!
My advice: cover the floors and electronics with plastic wraps, and stow away valuables .


7.       There are a lot of startup costs.
 
 
Maybe this isn’t your first rodeo, but for us it is. Wheelbarrows, ladders, paint supplies, mulch, and on and on and on. Borrow from friends or neighbors if you can, especially if you only need the tool for a short amount of time. If you need to invest in something that you will use over and over again spend the money. We tried to save money on some products that we needed by buying cheap quality but they were returned the next day. Ask your friends about the brands they trust.


8.       Some things need to be left to an expert.
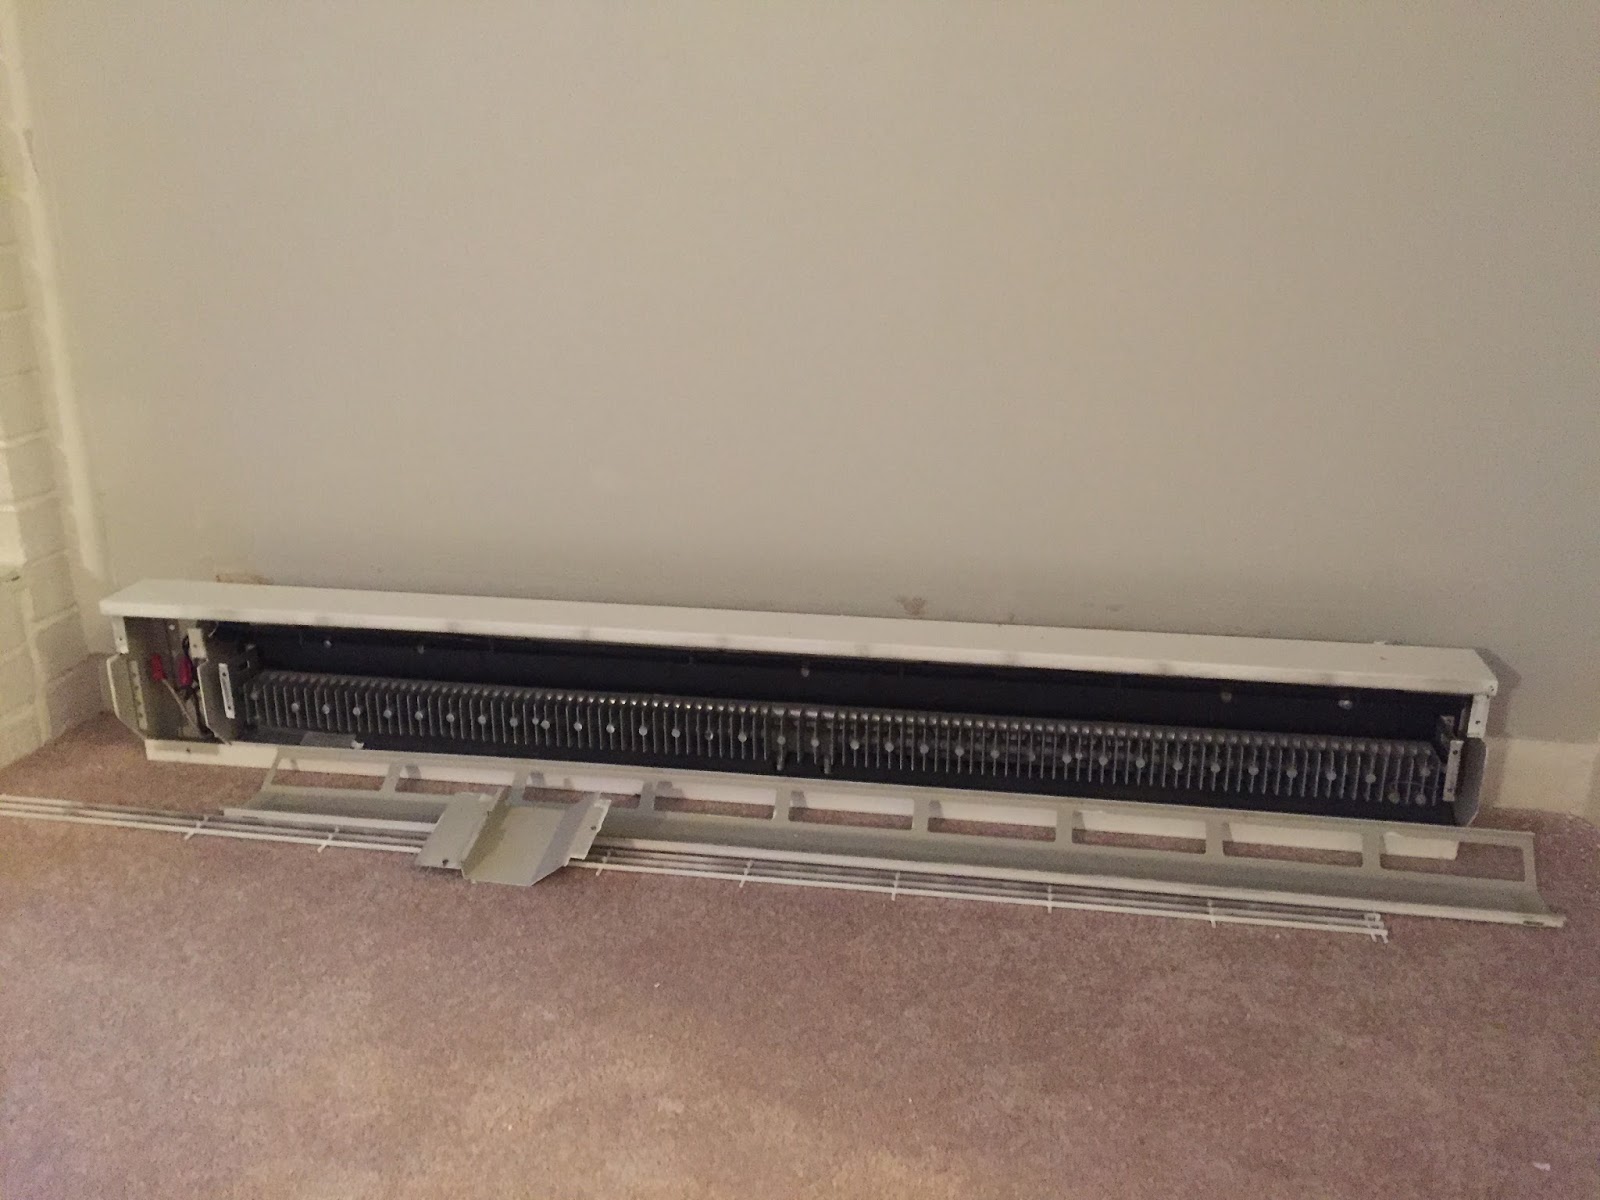
 
This is an electric baseboard heater: the most inefficient way to heat your home. We started to take them off the walls and put new drywall up.
 

When we figured out that taking of the heaters included electric work, drywall, and plaster work we decided two stop after taking two out. When we get our new heating system installed, the company will take the heaters out for us.
 
9.       Not all projects are created equal.


 Putting new trim in: Easy project. (As long as you buy the right size. Notice the quarter inch difference?) Taking down the wall that separates the kitchen from the living room: Not so easy. I asked my husband to look over my list and he suggested that new homeowners decide what they're willing to take on. Be realistic when it comes to the type of work you will need to complete to make your home livable.
 
10.   Some of the fun things have to come later.
 
My husband and I were so happy to buy a brand new bedroom set for our master bedroom after we got rid of our hand me down set. Then we realized we have some other priorities like paying for air conditioning. We settled on a $200 bedroom set in good condition that I'm going to paint (check back for updates!). The point is, new furniture is on hold until the necessities are taken care of.  No area rugs, light fixtures, or new bedroom set until we have air conditioning, painted walls , and a couch first.


Going through the second month of "fixing up" our fixer upper I can say it does get better. Take a look at all of the good work you have done and smile. Next week I'm featuring my pet project: the fireplace makeover! 

How I Turned Old Planters into New Outdoor Furniture

Sunday, August 7, 2016

One of the selling features of our home was the two acre lot we have. It’s tranquil, park-like, but with that beauty comes maintenance. With our attention on the inside of the house, we neglected to keep up the outside. That brings me to my outdoor furniture project. I was inspired by two different projects that I combined into one. They can be seen here and here.
 
Our backyard


The previous owners used the slab of concrete out in the yard as a fire pit spot. I wanted to convert it into a secondary seating area. Problem: new house= no money. I had to use what we already inherited from the previous owners as seating and tables.
 
 
I knew I wanted to spray paint these planters because they were faded grey and gross. I used steel wool pads and dish soap to scrub off the grime. After they dried I applied rubbing alcohol to get rid of all of the dirt.


Then I attached two planters together using liquid nails and let set for the recommended 24 hours. I created an ombre pattern with three different colors. The last coat was a glaze.
Wood will go on top here. See the ugly grey on the inside? That was the color of the outside before the project.
 
The final step is to place a piece of wood on the opening of the planters so guests can place their food/drinks down while they hang out. Check back in to see them in action. I plan on featuring these at our Housewarming Party!


See, it looks brighter already!


Create a Comfy Bay Window Seat

Saturday, July 30, 2016


One of my favorite nooks in our new home is the window seat that looks out our bay window. As soon as I saw it I knew it would be a perfect spot to take a nap or read a good book. I imagine our kitten hanging out on the seat on a sunny day. Okay...we don’t have a cat. But I have made it known that getting a kitten would enhance my quality of life. If think the deal is that once the living room is painted we can talk about it. But I don’t know if my husband actually agreed to this deal.
 
To create a Comfy Bay Window Seat I suggest:
-one bench seat cushion (to take up the majority of the seat)
Score a deal by shopping towards the end of summer when outdoor furniture goes on sale.
-two big square pillows (pictured here are 24 inches)
I use them for my head and feet if I want to curl up and take a little nap.
-two small square pillows (pictured here are 16 inches)
These are great for holding a book or a snack while you lounge.
-one lumbar pillow
Make sure you support your neck!
-one comfy blanket
For rainy days!


Our first housewarming gift was this cute pillow. Check back for updates on the adventures of our new home including our upcoming housewarming party!

Coat Rack and Organization Center

Saturday, July 23, 2016

 
Before
 
Grimey and Gross described this coat rack. After I cleaned it up and painted it using my new favorite paint, chalk paint, I would call it Gorgeous!


After


What I love about this coat rack is that it sits up against the wall and it also serves as an organizational center. The shelf and compartment are useful for holding your keys, mail, dog leashes, or whatever suits your needs. One thing my husband and I struggle with is getting everything we need together when getting out of the house. Have you seen my keys? Where are my headphones? Did I leave my badge for work in the laundry room? This coat rack is perfect for holding jackets for all seasons and becoming the organizational center of your home.
 
Status: For Sale $80

Kitchen Table Makeover

Sunday, July 17, 2016

When we moved to CT our apartment was sparse in furniture. A generous friend gave us a kitchen table to use. If you’ve ever lived in a small apartment you know that the table you have is your eating area, studying area, computer table, crafting table, gift wrapping table, and everything else in between. Now that we have moved I wanted to give our table a makeover. Light wood is not my thing so I tried out a grey/white chalk paint combo.


I don’t have any before pictures but I do have a close up of the original wood color.

I will debut my new kitchen table when our dining room receives a makeover. Check back for updates!

Brass Chandelier Update Using Chalk Paint

Sunday, July 10, 2016


One of the things I wanted to keep in our new home was this chandelier. But the brass needed an update.


I used three coats of chalk paint, one coat of clear wax, and inserted new lightbulbs.
We’re using LED lights in out light fixtures since they will last longer.


Keep these tips in mind if you plan to try this update in your home.
1.       Figure out what type of look you’re going for.
With one coat of paint the chandelier looked antique. You can even sand down the details to let the original finish peak through. Even after a second coat the chandelier looked worn. I chose three coats because I wanted the chandelier to look new and match my freshly painted dining table (check in next week for that beauty!).
 
Two coats of paint
 
2.       Keep track of your crystals.
Take multiple pictures from various angles. Consider labeling a Ziploc bag with the types of crystals that are in there and where they belong. My chandelier had four different types of crystals which I didn’t realize until after I hung them back up (in the wrong places).


3.       A little bit of wax goes a long way.
Towards the end, my back was aching and I just wanted to complete my project. I globbed on a lot of wax hoping to spread it quickly. The next morning I found some spots of wax that dried together and left a yellow residue. It took a little elbow grease to get into all of the nooks of the chandelier and get rid of the yellow.