Pages

3 Year Blogging Anniversary

Saturday, October 28, 2017

Technically, my blogging anniversary isn’t for a few more weeks, however, since Baby Long’s due date is the same time I don’t want to tempt fate and miss out on posting about this amazing student!
Mackada has been impressing me since she was in the 6th grade. Now that she is a freshman, she is putting herself out there and trying to make a difference. Besides focusing on her academics and soccer skills, Mackada wants to make a change in her school. She’s noticed that there is a huge gap between breakfast and lunch. Think about waking up and eating around 5:30 am and not getting your lunch till 1pm. How are kids supposed to focus?! She wants to implement a snack cart that would travel room to room and offer kids a mid-morning snack for a small price. She plans to donate her proceeds to hurricane relief.
Mackada is also really into fashion and dressing up, but what kind of fashionista doesn’t have a mirror in their room? About a month ago, I asked her for her thoughts on creating a mirror frame for a “client”. She suggesting metallic colors and lights!
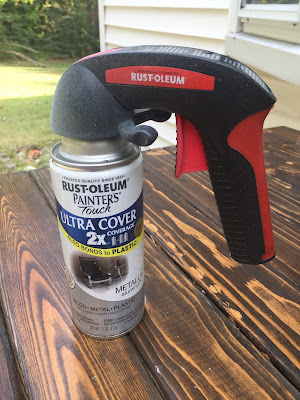
I started by constructing the frame and using a metallic spray paint.
 
 
Then I decided to give the frame a smooth/glasslike look. I used a protective finishing spray called Triple Thick Glaze.
To adhere the wood trim to the mirror I applied Liquid Nails to the back of the pieces and put weight on top of them. I let it sit overnight.
 
I bought string lights at TJ Maxx and figured I would just hang them off the frame freely. After brainstorming with Mackada, she decided to hot glue them around the perimeter.
 
 
I’m so glad we could complete this project together. Go, Mackada!



DIY Cat Bed

Sunday, October 22, 2017

In an effort to keep our kittens out of the baby’s furniture I am trying to make as many comfortable cat nap spots as possible.


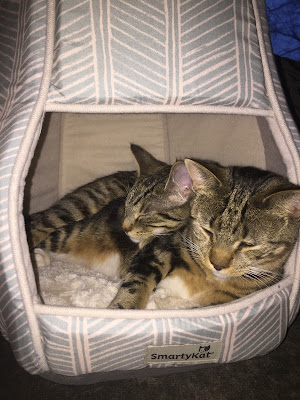
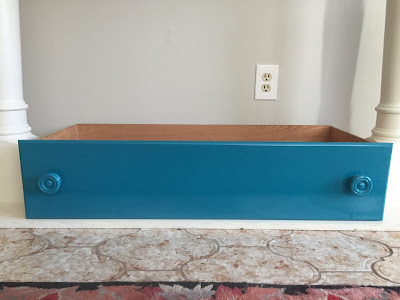
My cats love sitting in cardboard boxes and plush cat beds. I decided to combine the two using a leftover dresser drawer from a previous project.


 They also like to sleep together sometimes so I wanted to make one big enough they could both fit into.


Here are the steps I took to create a cat bed:
 
1.       Clean and sand dresser drawer
 
 
2.       Paint drawer and knobs


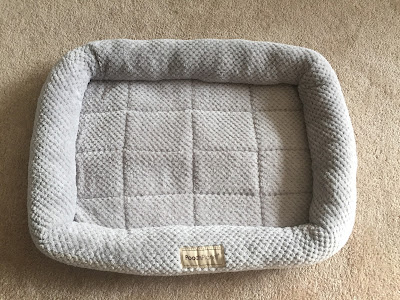
3.       Add comfortable seating


4.       Add catnip/treats


5.       Find the perfect spot for your new cat bed
 
 
I think it’s a success!


Don't Buy a Changing Table

Sunday, October 15, 2017

I am a huge fan of reusing what is already out in the world. When it came to my son’s nursery I knew we didn’t want to buy anything new (except the crib). I know many moms with beautiful nurseries full of brand new furniture and that is fine by me. Here’s why I chose not to buy a changing table.

1.       Using a dresser will let you keep the piece longer than the first few years of your baby’s life. When you use a changing table it explicitly looks like a changing table and cannot be repurposed after it's no longer needed. 
 
2.       There are so many pieces already out in the world. You will be surprised at the amount of waste that already exists. Check craigslist, Facebook marketplace, your local donation center, or the side of the road.
3.       You can get something else off your registry besides furniture. If a changing table costs anywhere from $100 and upwards, save that possible $100 purchase for something else you need for the baby.
4.       Buying used furniture allows you to customize it to your nursery theme. The piece we found was already grey and white and matched the nursery, but the original knobs were not our style. We opted for black geometric pulls from TJ Maxx and they made all the difference.
 
 
Tips for Keeping Baby Safe:
I can see why some families want everything brand spanking new for their bundle of joy with furniture recalls and new safety protocols coming out every day. Here are a few tips for keeping baby safe if you choose the used route:
1.       Inspect the piece of furniture you are using for the changing table and make sure it is structurally sound. Remember, it needs to be big enough to support a changing pad and steady enough to hold a wiggly baby.
2.       Thoroughly clean your furniture. We noticed that the drawers had some residue from what looked like paint stripper. After cleaning it and still unhappy with the result we put down contact paper to line the drawers.


3.       Do you feel comfortable making repairs if necessary? In our case, the dresser drawers had nails sticking through the bottom of each drawer in multiple areas. We removed all of the nails and reinforced the bottoms of the drawers.
4.       Consider using no VOC paints or milk paint when painting in the nursery. Wear a respirator and paint outside if possible or with windows open.
 
Need some inspiration to get started? Check out this before and after or give me a call! We can use a dresser you already own like this client did.


Galaxy Mural

Sunday, October 8, 2017


We are adding to the space theme of our son’s bedroom by creating a galaxy mural. I saw a tutorial here which I used as inspiration to make my own.
A local artist, teacher, talented photographer, and friend Tina helped me achieve the look I was going for. See her amazing work here.
I started by painting the wall a dark blue ahead of time.
 
Then, we mixed that blue with white to make a lighter blue.
 
 Tina painted random streaks across the wall and I used a slightly wet rag to smear the streak in a somewhat circular pattern.


After that dried we took the back of a small paint brush and used an acrylic white paint in pearl finish to add dots (stars) all over the wall.


 I'm looking forward to revealing the whole nursery in the next couple of weeks!

2 Orchard Basket Centerpiece Ideas

Sunday, October 1, 2017

 
Mum Centerpiece

 
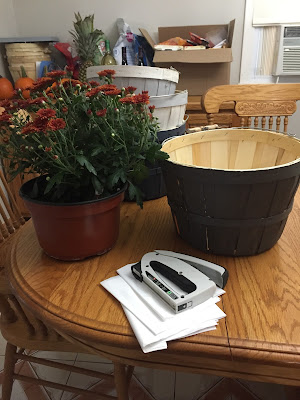
You can do this with any plant/flower. I used them as prizes during my baby shower. While I opened my gifts, we set a timer. When the timer went off a prize went to the person whose gift I was opening.
 

1.       Paint the outside of the basket. (My students actually painted these in class. It’s a great way to get kids involved. Just put some newspaper down, give them a foam brush and let them go!)

 
2.       Line the basket with a trash bag. I used a staple gun to do this.


3.       Fill the basket with soil.


4.       Pack more soil around your plant.

Snack Food Centerpiece

 
Easy and tasty centerpiece!
1.       Wrap a decorative ribbon around the basket.
2.       Fill the basket with tissue paper to add volume.
3.       Use craft paper to line the basket.
4.       Add a delicious snack!


Fall Flannel Blanket

Saturday, September 23, 2017


In honor of the first day of fall, yesterday, I wanted to share an easy DIY fall flannel blanket tutorial.
You will need a few flannel t-shirts, the bigger the better. You will also need a piece of fleece fabric.


I took four shirts and cut equal size pieces. Then, I sewed them together.


Since I made a baby blanket I did not need it to be too large. You may want to use more shirts depending on the size blanket you are looking to make.
After I sewed the shirts together I put the good side of the fleece to the good side of the flannel and pinned them. I sewed the two pieces together, trimmed the edges, and flipped it inside out.

Lastly, I sewed the entire perimeter of the blanket with a decorative stitch.


Kitten approved!
This blanket will be the best thing I could give my son. When my grandpa passed away last year, I knew I would want to keep something to remember him by. I took some of his flannels since that is what he was known for wearing. Now he will always have a place in our home.


 I used a wildlife print for the fleece in homage to my grandpa's style. His log cabin was decorated with deer, bears, and eagles.


Check back in for nursery updates. With less than 8 weeks to go we can't wait to meet our sweet boy!